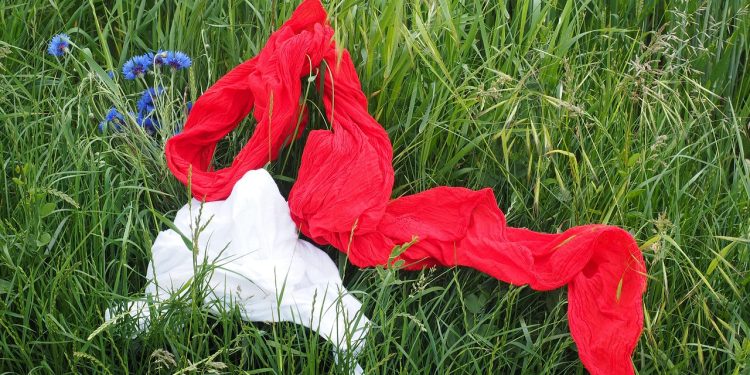
Scarves are versatile, lightweight accessories that can be easily transformed into stylish tops. Whether you’re looking for a unique summer look, experimenting with your wardrobe, or giving an old scarf a new purpose, these DIY scarf-to-top transformations are perfect for adding a creative twist to your outfit. Here’s a guide to turning scarves into fashionable tops with simple techniques.
Why Use Scarves as Tops?
- Versatility: Scarves can be styled in various ways, offering endless outfit options.
- Affordability: Repurpose scarves you already own instead of buying new clothes.
- Sustainability: Upcycle scarves for an eco-friendly wardrobe refresh.
- Travel-Friendly: Scarves are compact, making them great for on-the-go style changes.
Materials Needed
- Large scarves (preferably square or rectangular)
- Safety pins or fabric clips
- Optional: Needle and thread, fabric glue, or a sewing machine for more permanent designs
- Elastic bands for adjustments
- Strapless bras or bandeaus for layering (optional)
Simple Scarf-to-Top Transformations
1. Halter Top
Steps:
- Fold the scarf diagonally to create a triangle.
- Place the longest edge of the triangle across your chest.
- Tie the two top corners around your neck to form the halter.
- Secure the bottom corners behind your back with a knot or safety pin.
Style Tip: Pair with high-waisted shorts or skirts for a breezy summer look.
2. Tube Top
Steps:
- Fold the scarf into a rectangular shape, wide enough to cover your torso.
- Wrap the scarf around your chest.
- Secure the ends at the back with a knot or pins.
Style Tip: Layer with a denim jacket or blazer for added flair.
3. Off-Shoulder Top
Steps:
- Fold the scarf into a long rectangle.
- Wrap it around your shoulders and arms like a shawl.
- Tie or pin the ends at the back to create a fitted off-shoulder look.
Style Tip: Wear with skinny jeans or tailored pants for a chic outfit.
4. One-Shoulder Top
Steps:
- Fold the scarf diagonally to form a triangle.
- Wrap the long edge around your torso, bringing one corner over your shoulder.
- Tie or pin the ends securely under your arm or at your back.
Style Tip: Add statement earrings to enhance this asymmetrical style.
5. Backless Top
Steps:
- Fold the scarf into a triangle.
- Wrap the long edge around your torso, crossing the corners at the back of your neck.
- Secure the corners with a knot or pins at the nape of your neck.
Style Tip: Pair with a flowy maxi skirt for a bohemian vibe.
Advanced Scarf Top Designs
1. Wrap Top
Steps:
- Fold the scarf into a rectangle.
- Wrap it around your chest, crossing the ends in front.
- Tie the ends behind your back.
Style Tip: Use a brightly colored or patterned scarf to make the wrap top stand out.
2. Knotted Crop Top
Steps:
- Fold the scarf into a triangle.
- Place the longest edge along your chest.
- Knot the two top corners in the front and tie the bottom corners behind your back.
Style Tip: Combine with high-waisted jeans for a casual, trendy outfit.
3. Criss-Cross Top
Steps:
- Fold the scarf into a long rectangle.
- Wrap it around your torso, crossing the ends at the front to form an X shape.
- Tie the ends at the back.
Style Tip: Wear with a fitted pencil skirt for a bold, elegant look.
4. Braided Scarf Top
Steps:
- Cut two scarves into long strips.
- Braid the strips together to form the main body of the top.
- Use additional strips to create ties for securing the top at the back.
Style Tip: Use scarves in contrasting colors for a unique braided effect.
No-Sew Adjustments and Hacks
- Safety Pins: Use pins to secure loose ends for temporary styles.
- Elastic Bands: Create ruching or cinched effects with elastic bands.
- Double-Sided Tape: Keep the scarf in place without permanent alterations.
- Brooches: Add decorative brooches to hold scarf tops together stylishly.
Permanent Scarf-to-Top Transformations
For those who want a longer-lasting scarf top, consider sewing or gluing your design.
1. Sewn Tube Top
Steps:
- Fold the scarf into a rectangle.
- Sew the sides together, leaving space for armholes.
- Hem the top and bottom edges for a clean finish.
2. Adjustable Halter
Steps:
- Fold the scarf into a triangle.
- Sew straps onto the top corners for a secure fit.
- Add an elastic band to the bottom edge for flexibility.
Styling Tips for Scarf Tops
- Layering: Wear a strapless bra or bandeau underneath for comfort and coverage.
- Accessories: Pair with statement necklaces, earrings, or bracelets to elevate the look.
- Bottoms: Match scarf tops with high-waisted jeans, skirts, or shorts for a balanced silhouette.
- Shoes: Choose sandals or wedges for casual styles, or heels for a dressier look.
Benefits of Transforming Scarves into Tops
- Sustainability: Reduce waste by repurposing scarves into wearable garments.
- Budget-Friendly: Avoid the cost of buying new clothes.
- Travel-Ready: Scarves are lightweight and multifunctional, making them ideal for packing.
- Creative Freedom: Experiment with colors, patterns, and styles to suit your preferences.
Transforming scarves into tops is a simple yet effective way to refresh your wardrobe and express your creativity. Whether you’re heading to the beach, a festival, or a casual outing, these versatile scarf tops are sure to make a statement while keeping you comfortable and stylish.


